Tuesday, March 22, 2016

Chipotle Chicken, Mango, and Black Bean Enchiladas


This isn't even the last enchilada recipe I want to try. I still have one more. Somebody....stop me.

Here's all my ingredients (minus the soy sauce and tortillas-fail) ready to go.
 This was my first time trying to dice up a mango, and I have to say it was kind of a pain. It could be that my mangoes weren't quite ripe enough, I don't know. I've never actually cooked with them. That was probably the most difficult/annoying part of this recipe. Everything else was simple.

I cooked the chicken

and the sauce.

Here's the enchilada filling all ready to go.

Honestly I feel like a 15 ounce can of black beans was a bit too much. Next time I'd probably use a smaller can (if they exist).

I assembled the enchiladas and stuck them in the oven. Unfortunately, I forgot to take a picture of them before they baked. But here's what they looked like after baking with the remaining mango sprinkled on top.

These were definitely good. And spicy! They're spicier than I expected, but not unbearable. I only added one teaspoon of chipotle chili powder since I wasn't sure how hot they would be, which I feel was a smart move. They're sweet, but not overly sweet.

That was my attempt at showing the inside of the enchiladas. I'm still learning with the whole food photography thing. Overall, I could see myself making these again. 3 stars due to mango difficulties and too many black beans.

Thursday, March 17, 2016

Homemade Cinnamon Bread


Happy St. Patrick's Day everyone!! I made cinnamon bread! I'll admit I wanted to do a little more Irish of a recipe, but I didn't find anything that really excited me. Plus I already had all the ingredients on hand for this.

I melted the butter in the milk.

I added the yeast after it had cooled, but things didn't look any different, so there's no picture. I mixed the sugar and eggs in my stand mixer.

Added the butter/milk/yeast mixture.
I realize these pictures aren't that exciting. Even my camera was acting up, so I know they're not much to look at.

Here's the dough after I added the flour and salt:

After switching to the dough hook and letting it beat around for about 10 minutes, it looked a lot better.

Believe it or not, I don't have any glass or metal mixing bowls, so I just used these plasticy ones.

After letting the dough rise for two hours, it didn't look very different, but I pressed on and rolled it out onto the counter.

I sprinkled on the cinnamon sugar, and it wasn't until I started to roll it all up that I realized I forgot to spread butter on the dough before adding the cinnamon sugar. I briefly thought about trying to scoop it all off, adding butter, then trying again. But then I thought it couldn't make that much of a difference, and continued onward.


I let the dough rise for two hours again, and I swear it didn't rise at all. Husband says it did, but to me it looked exactly the same. But again, I persevered for the sake of this blog. You're welcome. ;) Coming out of the oven, the bread looked like this:

Still unsure of whether or not this had worked, I popped it out of the pan, and cut off a piece. Success! I was really surprised. Due to what looked like a lack of rising, I was pretty convinced my yeast had gone bad and thrown off the recipe. So I'm happy to say that this recipe is not a fail, and I will probably make it again. The only downside is it is kind of an all day process. I started the recipe around 1, and the bread didn't go in the oven until 6. 3 stars for this one.

Friday, March 11, 2016

One Pot Teriyaki Chicken and Pineapple Rice


Oh my lovelies...this one is a winner. Spoiler alert! The thing that instantly piqued my interest with this recipe was the pineapple rice. And when we were in Disneyland last week, Husband bought a pineapple spear for a snack and it was insanely juicy and sweet. We were both pretty surprised, and thinking about that is what pushed me to try this out today. That and the fact that it's actually quite simple.

The chicken can marinate anywhere from an hour to overnight. Mine ended up marinating for about 5 hours.

I didn't take any pictures of cooking the sauce down as you really do have to keep an eye on it and stir it constantly so the sugar doesn't burn. But I should hope no one really needs a picture of that. Pretty straightforward, right?

Browning the chicken was a bit more....fun? The olive oil and bits of sauce leftover in the pan splattered rather violently when I first put the breasts in. So please excuse my dirty stovetop for the remainder of tonight's pictures.


I wasn't too worried about the darker areas on the chicken as the original blogger's chicken also had some very dark bits. Cooking the rice was less exciting. Add the liquid, simmer, add rice and pineapple, cover and wait.


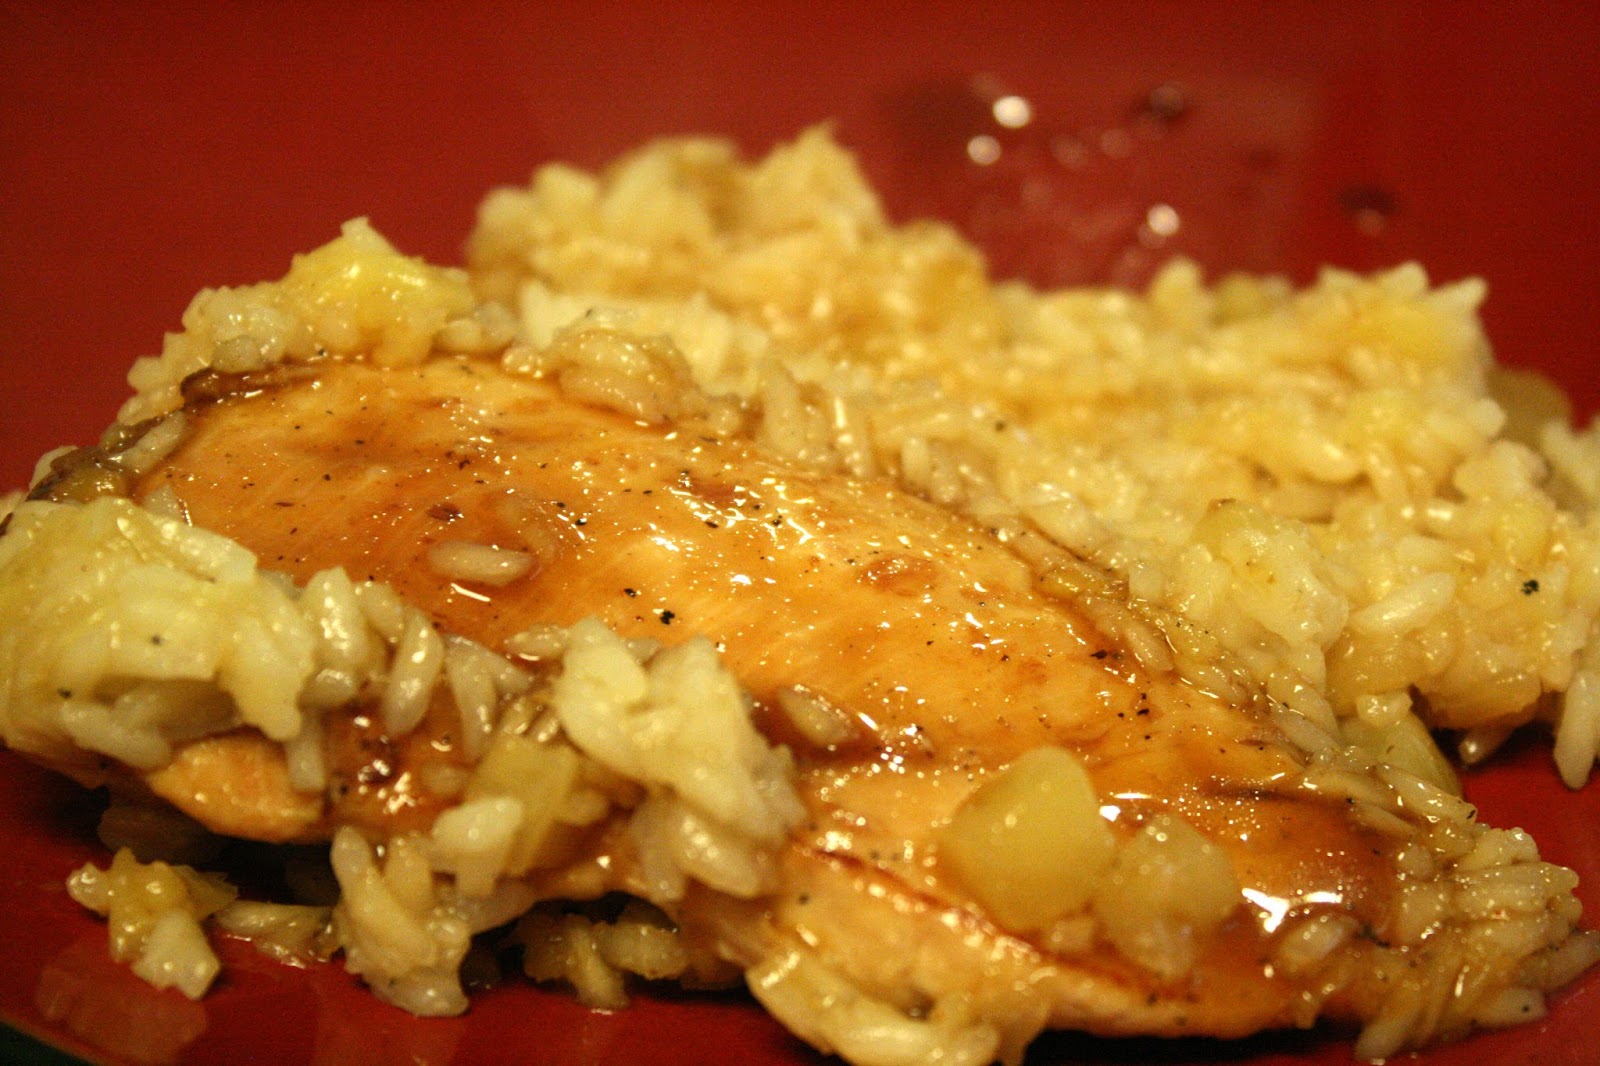
When I removed the lid to add the chicken back into the pot, it looked like this:

Still pretty wet. But the rice wasn't supposed to be completely done at this point anyway. So I added the chicken and brushed on some more of the sauce.

After probably 10 minutes or so, not totally positive since my mom called me, I decided it was probably done. The chicken breasts I bought were a bit thinner so I wanted to make sure I didn't overcook them.

After stirring everything around, I was confident it was all good to go. The rice at the bottom of the pan had browned slightly, even though there was still a bit of liquid at the top. But after I stirred it, things looked better.

I know I already said this recipe is a winner, but really it was a lot better than I was expecting. To me, the rice really brings it all together. The chicken is great on its own, but if you get a bite with a piece of pineapple, that sweetness just makes it amazing. And it's one pot! Hooray for easy clean up! So if it isn't already obvious, this one gets 4 stars from both of us and is definitely going in the recipe book to make again.

Sunday, March 6, 2016

My Favorite Disneyland Treats

I know I missed the last two weeks. My bad. This last week we went on vacation to Disneyland, so the week before I was busy getting ready for said vacation. The night before we left, I tried reheating the lasagna roll ups I'd just posted. I followed the directions from PW and the roll ups were still frozen in the middle when I took them out of the oven. :( I did think it was weird that the reheating directions called for a lower temperature than the original recipe. I kept the other batch to try again with a higher cooking temperature.

Since this is a cooking blog though, to make up for my missed weeks, I'll post my own must try Disneyland treats. I know lots of people have thrown their opinions on this into the ring, and now it's my turn! In no particular order: (none of these pictures are my own)

Dole Whip
I've tried the standard Dole Whip and the Dole Whip float and both are glorious. That being said, I prefer the original a little more than the float so I can get more of the ice cream. ;) These can be found outside The Enchanted Tiki Room in Adventureland.

Mickey Beignets
For those who don't know, beignets are very similar to donuts. And these are delicious. They're warm, soft, and cover you in powdered sugar by the time you're done eating them. Super messy but totally worth it. You can get these at the Mint Julep bar in New Orleans square near the Haunted Mansion. And on that note...

Mint Julep
I LOVE Disneyland mint juleps. They're probably my all time favorite park treat. They're very faintly minty, mostly with a lemon-lime flavor. So SO good. I even asked for the recipe when I was there before this trip. I have yet to make them though, as the recipe is quite large. These can also (obviously) be found at the Mint Julep Bar.

Mickey Pretzel
 I'm a sucker for cute food and love a good soft pretzel so these are a no brainer for me. They can be found at various food carts around the park.

Turkey Leg
The turkey leg is one of those things I think everyone needs to try at least once. No picture can convey how huge these things are. However, they are REALLY good. They have a kind of sticky honey glaze that is amazing. You do end up pretty sticky and they're hard to eat, but I think everyone should give them a shot at some point. You can find the turkey legs at Edelweiss Snacks near the Matterhorn in Fantasyland.

An honorable mention also goes to the peanut butter sandwich at Pooh Corner in Critter Country. 

I had every intention to try one of these, only to get to Pooh Corner and find out they've been discontinued. :( I did find a copycat recipe that I plan on trying because I just have to know what they're like. 

I know there are a lot of other good treats to try at Disneyland, but that just gives me another reason to come back!

Tuesday, February 16, 2016

Spinach Lasagna Roll Ups

Husband and I are trying to be healthier and as part of that Husband wants to try to eat less meat. So I decided to give this recipe a go. I did combine it with another one when it came time to assemble the roll ups and bake them, and I'll post the link when I come to that point.

First I cooked the lasagna noodles and laid them flat on some foil. I did have more noodles than are pictured, but due to a lack of counter space, I left the rest of them in the colander.

Making the filling was easy. First I drained my thawed spinach:

Then I added the cheeses, egg, and salt and pepper.

It all got mixed together:

Now here is where I deviated from the original recipe's instructions. Since there's just the two of us I followed the Pioneer Woman's directions for freezing lasagna roll ups in foil loaf pans. I put some marinara in the bottom of the pan:

Then put four roll ups in each pan with more sauce on top.

I added more cheese to the tops because...cheese. I love cheese.

One of the pans went in the oven for us to eat tonight and the other two got covered with foil and stuck in the freezer for a later date.

I followed the baking instructions on PW's website and when it came out of the oven they looked like this:

PW recommends two roll ups as a serving for your normal adult. And these roll ups did end up fuller than I expected so I think that's the perfect serving size. They were a little difficult to eat, but pretty tasty. I'm excited to see how the frozen ones hold up. Husband and I agree on 3 stars for this one.

Thursday, February 11, 2016

Loaded Chicken and Potatoes

I originally saw this recipe on one of those recipe videos floating around on Facebook. I'm sure you've seen at least one of them, they seem to be everywhere! But this looked pretty good so I decided to give it a go.

It was really easy, just took some time to chop up the potatoes and chicken. I only bought six potatoes as the ones I found were pretty large.

I mixed up the...sauce? I guess you could call it in a small bowl. I cut the amount of garlic powder in half, because well...garlic. I haven't been shy about my dislike of garlic. I had to resist cutting the amount down further because 2 tbsp seemed like a LOT of garlic powder.

I poured the sauce over the chicken and potatoes and mixed it all up. Definitely use a large bowl for this, it's a lot of food.

Then I poured it into my pan. I sprayed the pan with cooking spray, even though the recipe didn't mention it. In my mind it's never a bad idea to do so. The times I've forgotten I've definitely kicked myself for it.

While the whole thing was baking in the oven, I cooked and crumbled the bacon.

With five minutes left on the timer, I sprinkled the bacon on the chicken and potatoes, then put the cheese on top of all that. After the whole mess came out of the oven, it looked like this:

I have to say I'm still a little unsure about how I feel about this recipe. Husband called it a casserole, and for some reason I don't like that idea. Maybe because casseroles tend to have a reputation of being the go to meal when someone needs meal assistance because they're easy. I don't know. But anyway, the taste was good, but not great. It wasn't terrible, but it wasn't amazing either. The word that came to mind as I was eating was mediocre. Husband said I should keep the recipe, but I don't know if I will. I want to keep the recipes that make me smile and proud of what I've put together. So I guess this one falls somewhere between 2 and 3 stars.

Thursday, February 4, 2016

Peanut Butter Chocolate Chip Cookies

I have semi-sweet chocolate chips on hand right now because I wanted to make muddy buddies. Usually I have milk chocolate because I just like them better for when I make cookies. So, I tried this recipe as a way to use up some of the semi-sweet chips. The recipe directions were super simple. Add all the ingredients except the milk and chocolate chips to a mixing bowl and mix.

After mixing those, it says to add 1/2-1 tablespoon of milk to make the dough smooth. Honestly I probably could have gotten away with not adding the milk at all, my dough was already pretty smooth at this stage. But, since I'd never tried this recipe before I added 1/2 tablespoon. I also added the lesser amount of chocolate chips because I don't like my cookies overloaded.

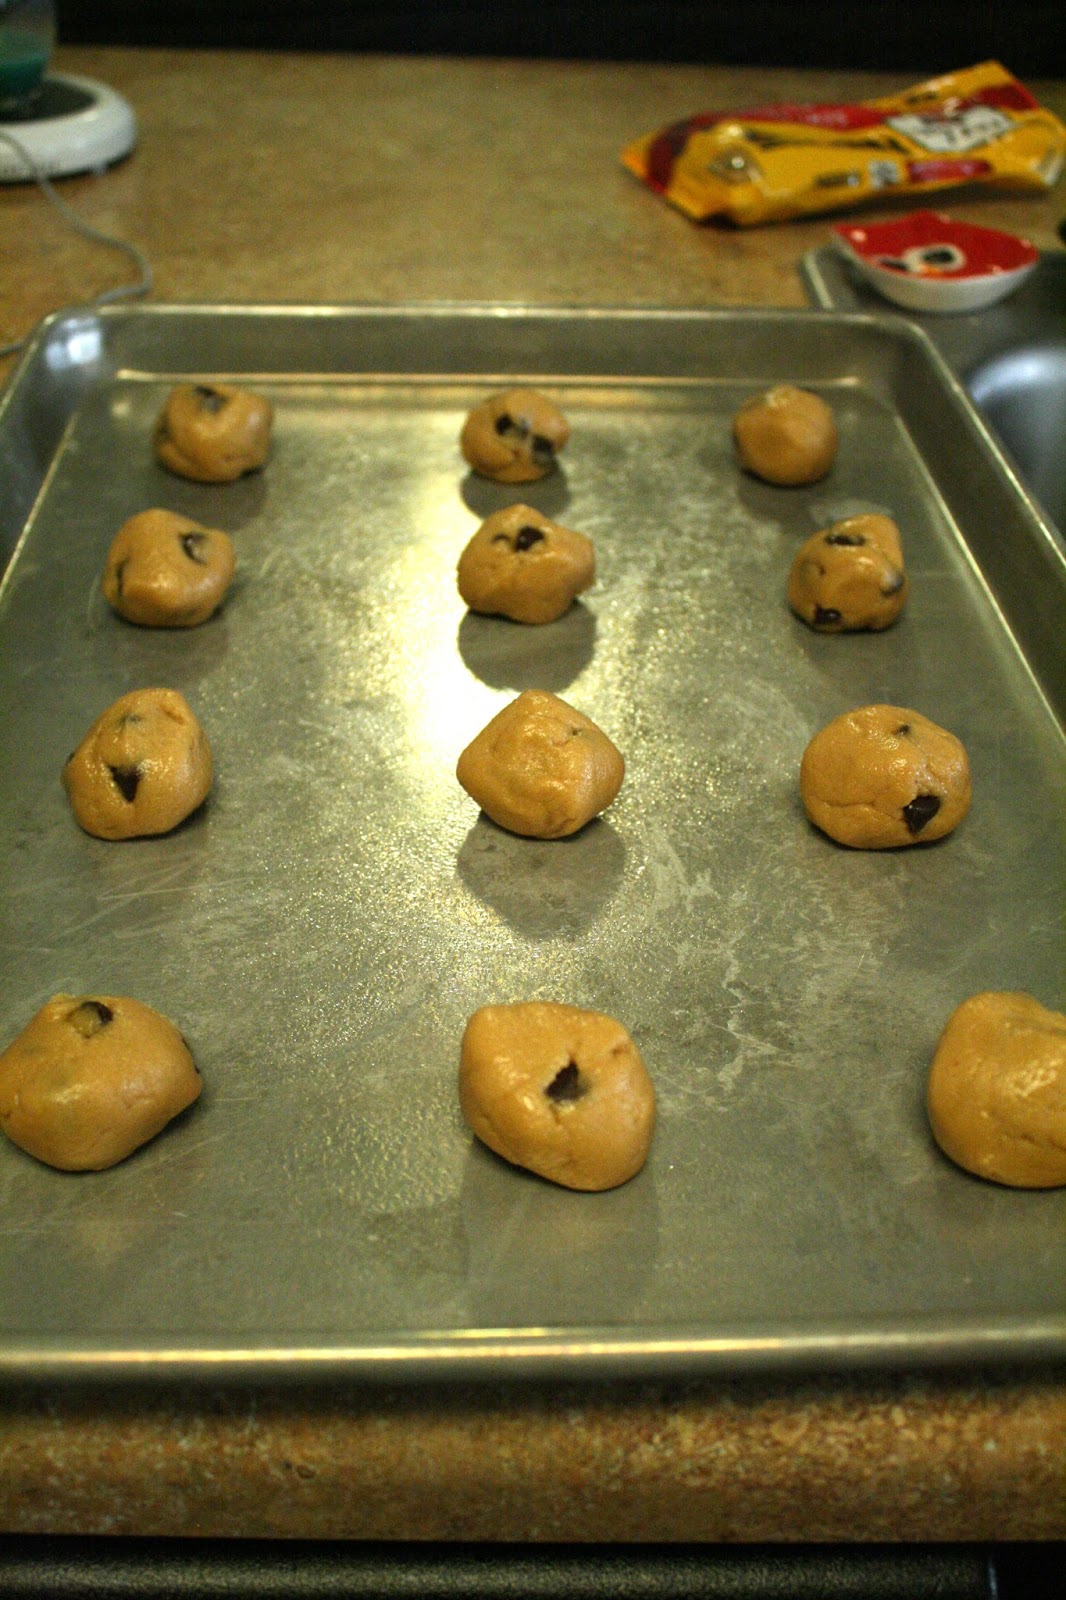
At this point the dough was super smooth and squishy. Almost moreso than I would have liked. I rolled it into balls and popped them into the oven.

I baked them for the shortest amount of time since I like soft chewy cookies. These were beyond soft and chewy. Almost all of them fell apart as I tried to take them off the cookie sheet to cool.

For the next batch, I baked them the maximum amount of time. Those ones held up better, but they were still extremely fragile. They taste pretty good, but I'm not impressed with how the dough behaves. Maybe next time I'll eliminate the milk entirely. Husband likes them, but I have yet to bake something he doesn't like. I think these will only get 2 stars and may find themselves in the fail pile.